Attach, replace, and view receipts
You can attach a receipt when one is missing, replace an existing receipt with a new copy, or view a receipt that has already been uploaded.
Receipts help keep your expenses organised and provide supporting documentation for expense claims.
Attach a Receipt
If an expense does not have a receipt attached, you can add one directly from the expense details.
Click on the Expense you want to update.
Click Upload Receipt button on the left side.
Select the receipt file from your device.
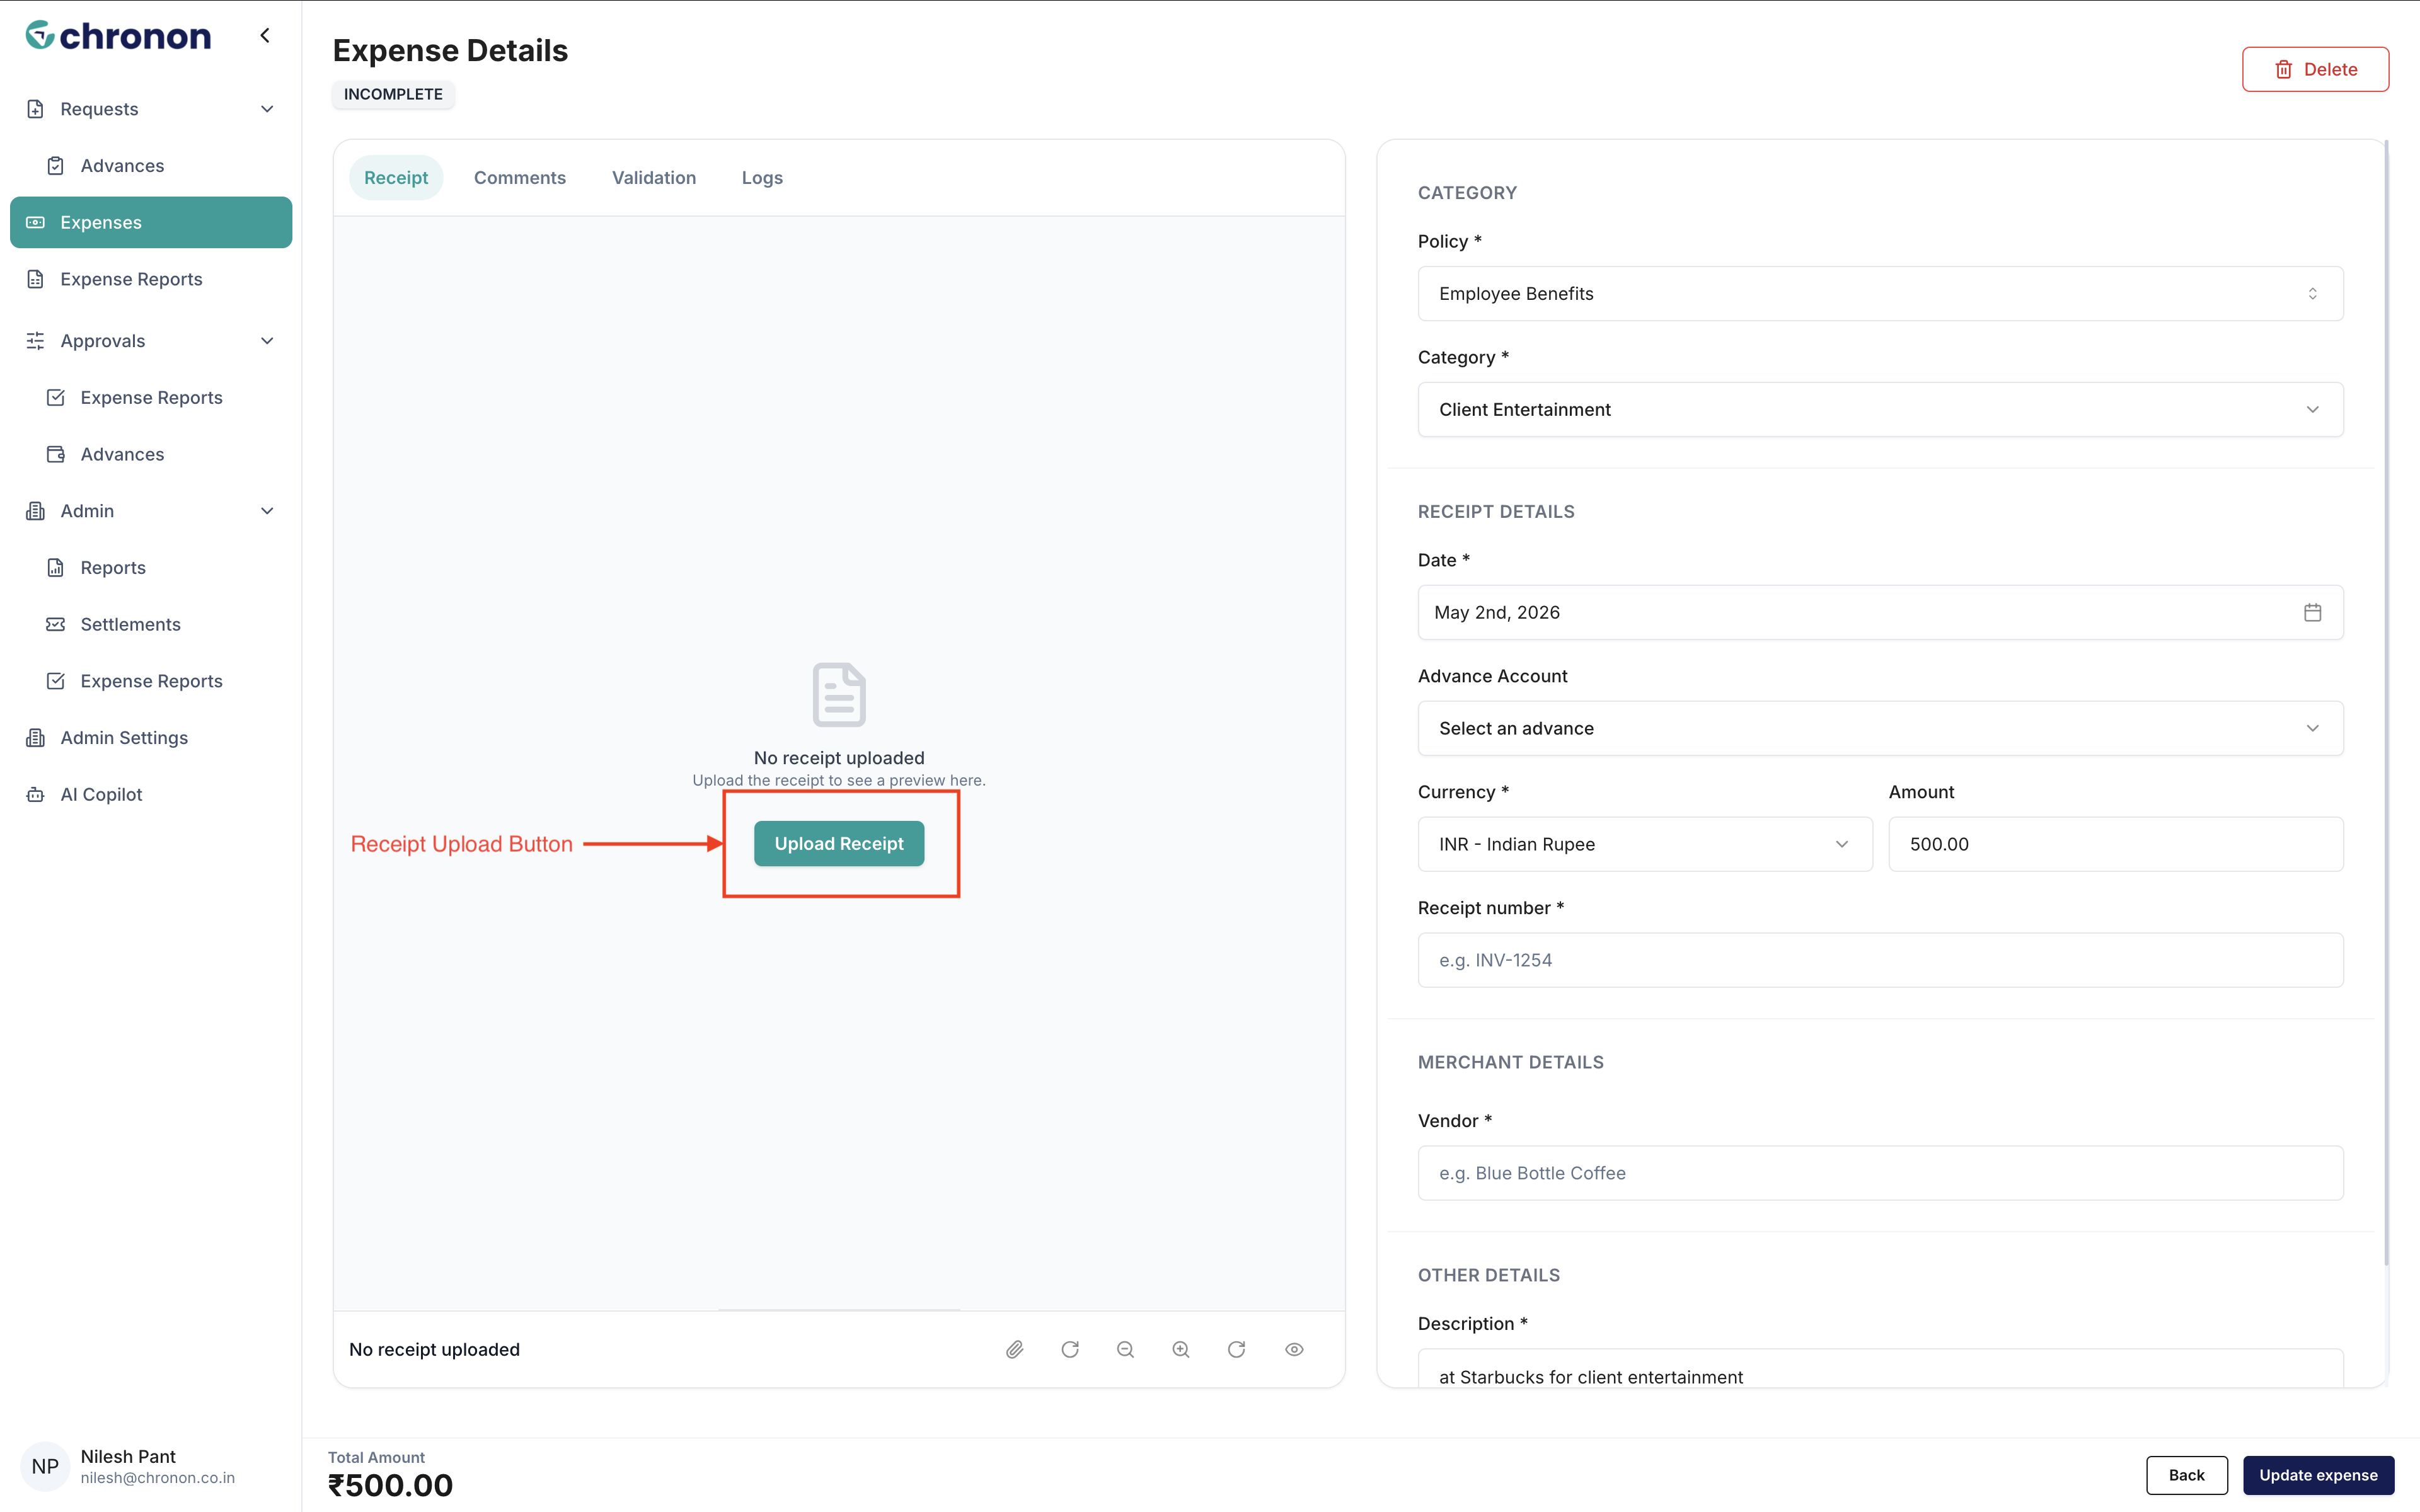
Once uploaded, the receipt will be associated with the expense and available for viewing.
Tip: Make sure the receipt is clear and readable before uploading it.
Replace a Receipt
If the existing receipt is incorrect, outdated, or unreadable, you can replace it with a new file.
Open the relevant Expense.
Go to the Receipt section.
Click Replace Receipt.
Select the new receipt file from your device.
Confirm the upload.
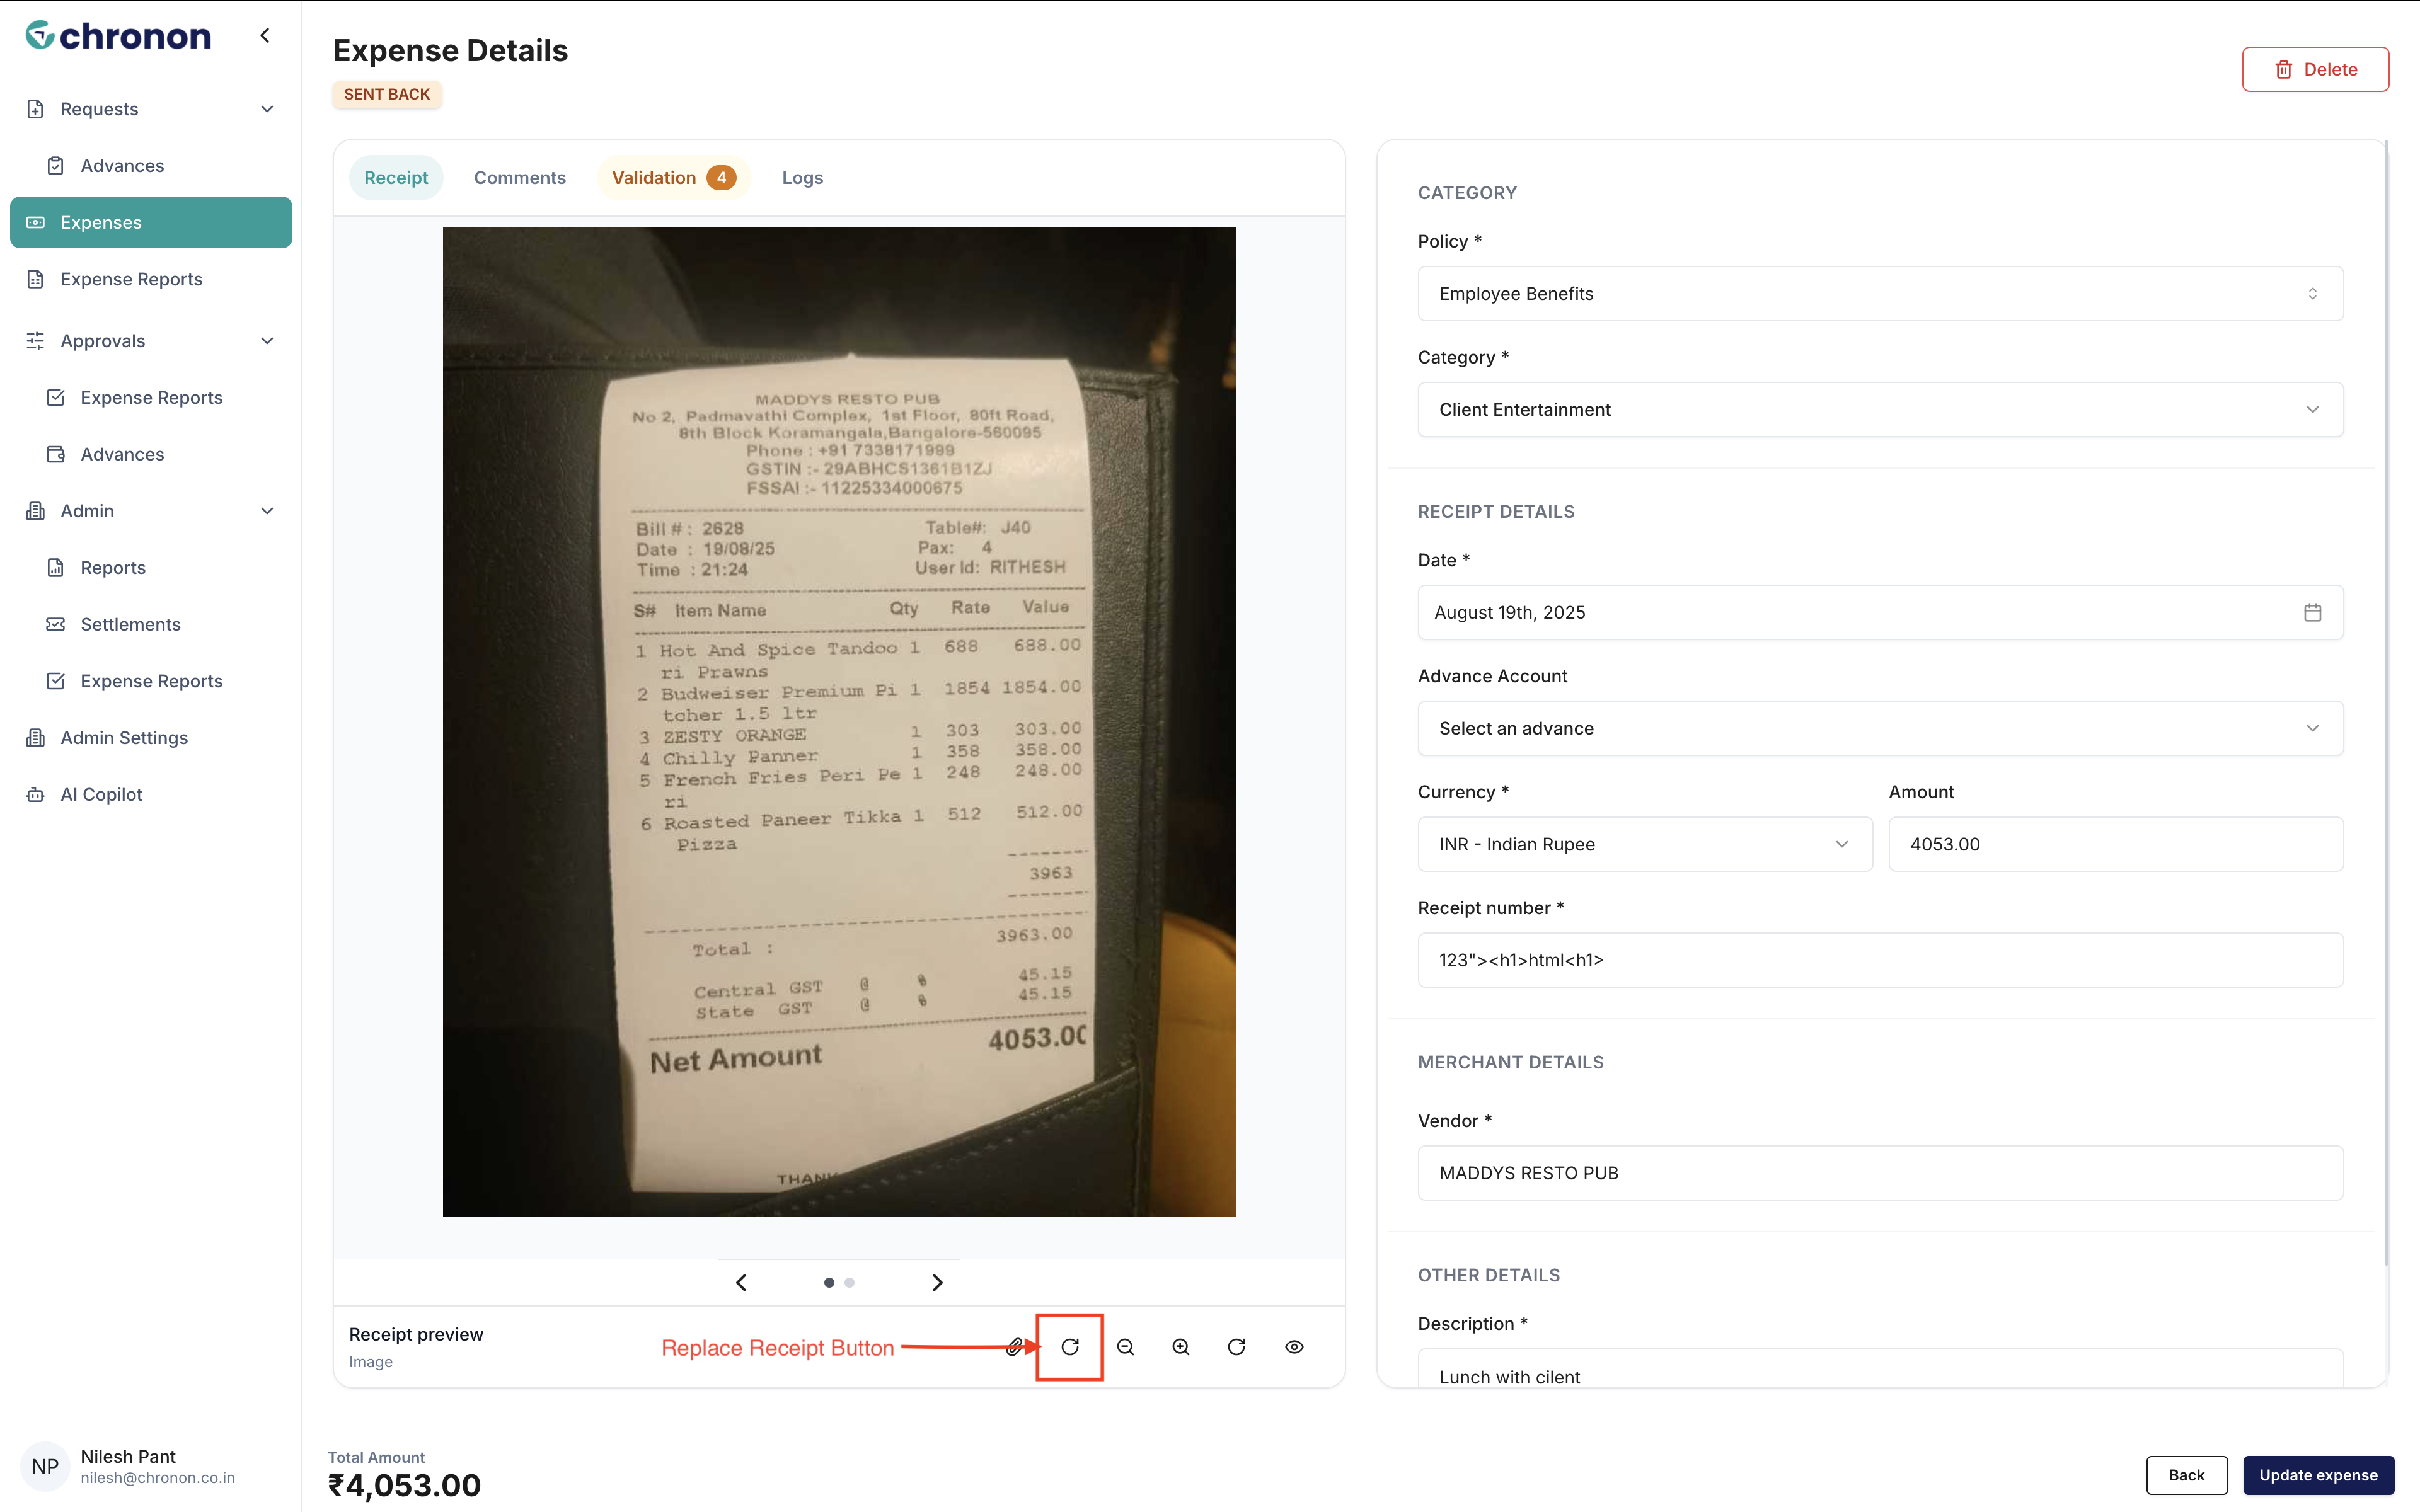
The new receipt will replace the previously attached receipt for that expense.
View a Receipt
You can view an attached receipt at any time from the expense details.
Open the Expense.
Locate the Receipt section.
Click on the receipt to view it.
The receipt will open so you can review the uploaded document.
Receipt Availability
No receipt attached: The Attach Receipt option is available.
Receipt attached: You can View or Replace the receipt.
Receipt upload failed: Try uploading the file again or use a supported file format.
Keeping receipts attached to the correct expenses helps maintain accurate expense records and makes them easier to review.